
The Ultimate Checklist for Logos Conversion for Pfaff Embroidery Machines
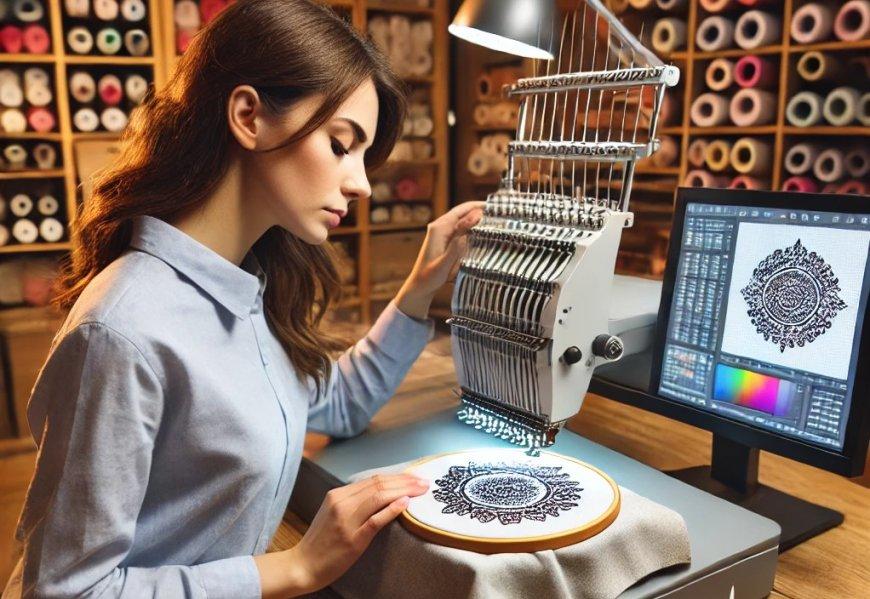
You have a crisp, professional logo and a fantastic Pfaff embroidery machine. You are ready to stitch your brand onto uniforms, caps, and promotional items. You load your logo onto a USB stick, plug it in, and hit start. Thread breaks. The design looks distorted. The machine jams. What went wrong?
Here is the hard truth. Your Pfaff machine does not speak the language of regular images. It speaks stitches. And if you skip the proper conversion process, you are setting yourself up for costly mistakes.
This ultimate checklist walks you through exactly what you need to do for successful Logos Conversion for Pfaff Embroidery Machines. Follow these steps, and you will avoid the most common pitfalls that ruin logos and waste materials.
Understanding Your Pfaff's Language
Before you convert anything, you need to know what your machine actually reads. Pfaff machines use several embroidery file formats, and which one you need depends entirely on your model.
Pfaff File Formats at a Glance
Different Pfaff models read different formats. Here is a quick breakdown :
-
PCS: An older format used by Creative 7570, 7560, and similar models. Contains basic stitch coordinates and color sequences .
-
VIP: A legacy format used in machines like the Creative 4.5 and 2170 .
-
VP3: The preferred format for most modern Pfaff Creative machines. Preserves color information and allows for future edits .
-
VP4: The newest format designed for top-tier models like the Creative Icon .
For production work on modern Pfaff machines, VP3 is typically your best choice because it maintains color data and supports advanced editing . The Creative Icon supports VP3 and VP4, while older machines may only read PCS or VIP .
Some Pfaff machines can also read industry-standard formats like DST, PES, and EXP . But for the most reliable results, stick with your machine's native formats.
Checklist Item: Identify your exact Pfaff model and confirm which formats it supports before you start.
Preparing Your Artwork for Conversion
The quality of your final embroidery depends heavily on what you start with. Skipping the artwork preparation step is one of the fastest ways to ruin a design.
Choose High-Resolution Artwork
Start with the highest resolution version of your logo possible . Vector files like AI, EPS, or SVG are ideal because they scale infinitely without losing quality. While JPG or PNG files can work, they often lose detail when enlarged, making the digitizing process more difficult and less precise .
Clean Up the Logo
Remove unnecessary shadows, gradients, or extra elements that will not translate well into stitches . Clear, bold shapes with defined edges digitize cleaner and result in more professional embroidery. If your logo has fine details that look like they might be problematic at small sizes, consider simplifying them or making them bolder before conversion.
Plan Thread Colors
Colors on your computer screen do not always match thread shades . During preparation, identify the closest embroidery thread colors to your brand specifications. This ensures your stitched logo looks true to the original design once finished.
Consider Placement and Scaling
A logo that looks great on paper needs adjustments depending on where it will be placed . A left chest logo should remain small and crisp. A cap logo may need wider lettering to prevent distortion on the curve. Tell your digitizer exactly where the logo will be stitched.
Checklist Item: Prepare clean, high-resolution artwork and plan your placement before digitizing begins.
The Conversion Process: Your Step-by-Step Checklist
Whether you digitize yourself or hire a professional, here is what a proper conversion should include.
Step 1: Import the Logo into Software
Open professional embroidery digitizing software and import your artwork . Pfaff's own ecosystem includes mySewnet, which is part of the Creative Embroidery software . Other industry standards include Wilcom Embroidery Studio and Hatch .
Step 2: Assign Stitch Types
Every area of your logo needs the right stitch type :
-
Satin stitches for text, borders, and thin elements. These create a smooth, raised, polished look.
-
Fill stitches (tatami) for larger areas and backgrounds. These create a flat, woven texture.
-
Running stitches for fine details and underlay.
Step 3: Adjust Density and Add Underlay
Stitch density controls how close stitches sit together. Too dense causes puckering and thread breaks. Too loose lets backing show through .
Underlay stitches go down first, stabilizing the fabric and preventing shifting. This hidden foundation makes the difference between professional and amateur results .
Step 4: Set Stitch Direction and Pull Compensation
Stitch direction affects how light reflects off the finished embroidery. A skilled digitizer plans direction to follow the natural flow of your design .
Pull compensation accounts for fabric distortion during stitching. Thread tension pulls fabric inward, so the digitizer widens certain areas ahead of time so they end up the correct size after stitching .
Step 5: Assign Thread Colors and Sequence
Match thread colors to your brand specifications using standard thread charts . Define the stitching sequence so the machine sews in the correct order—backgrounds before text, larger areas before small details.
Step 6: Save in Pfaff-Compatible Format
Export the finished design in the correct format for your Pfaff machine . For most modern machines, VP3 is the recommended choice.
Step 7: Run a Test Stitch-Out
This step is non-negotiable. Always test your design on scrap fabric similar to your final garment . Check for gaps, misalignment, density issues, or thread breaks. If problems appear, go back and adjust the file.
Checklist Item: Verify that every step above has been completed before you stitch on your final product.
Three Methods to Convert Your Logo
You have several options for converting your logos. Each comes with trade-offs.
Option 1: Professional Digitizing Software
If you digitize frequently, professional software gives you complete control. Programs like Wilcom, Hatch, and mySewnet allow you to create stitch files from scratch .
Pros: Full creative control, fine-tune every stitch, professional results.
Cons: Expensive (hundreds or thousands of dollars), steep learning curve .
Option 2: Auto-Digitizing Tools
Many programs include auto-digitizing features that convert images with a few clicks . Sounds tempting, but the results are often disappointing.
Pros: Quick and convenient for simple designs.
Cons: Fails on complex logos. Produces jagged outlines, incorrect density, missing underlay, thread breaks .
Option 3: Professional Digitizing Services (Recommended)
For most businesses, hiring a professional digitizing service delivers the best results with the least hassle . Experienced digitizers manually create stitch files optimized for Pfaff machines.
Pros: Expert results, fast turnaround, prices starting around $10 per logo, free edits until satisfied .
Cons: Small fee per design.
Checklist Item: Choose the method that fits your budget, time, and quality requirements.
Common Problems and Quick Fixes
Even with proper conversion, issues can arise. Here is how to fix them :
| Problem | Likely Cause | Quick Fix |
|---|---|---|
| Thread breaks | Density too high or tension too tight | Reduce density or loosen tension |
| Fabric puckering | Insufficient stabilizer or density too high | Add stabilizer or reduce density |
| Gaps in design | Missing pull compensation for fabric type | Adjust pull compensation for specific fabric |
| Machine rejects file | Wrong format or USB issue | Format USB as FAT32, use VP3/PCS/VIP format |
Checklist Item: Test stitch-outs catch these issues before you ruin final garments.
Conclusion
Converting your logo for a Pfaff embroidery machine is not complicated, but it requires attention to detail. Your Pfaff needs specific file formats like VP3, PCS, or VIP. Your artwork needs proper preparation. The digitizing process needs the right stitch types, density, underlay, and pull compensation.
Follow this checklist every time you convert a logo:
-
Identify your Pfaff model and required format
-
Start with clean, high-resolution artwork
-
Plan placement and fabric type
-
Use professional digitizing software or hire a service
-
Run a test stitch-out before production
Skip any of these steps, and you risk ruined garments, wasted thread, and a logo that makes your brand look cheap. Follow them all, and you will get consistent, professional results that make your business shine. Your Pfaff machine is waiting to do its best work. Give it the right files, and it will deliver.